背景介绍
无人值守在实际中具有非常广泛的应用,例如:对于测量测试领域,具有重复性强(齿轮箱监测等)、危险性高(爆炸冲击实验,深海探测等)的场景,非常适合采用AI算法进行无人值守。另外,无人值守也非常适用于工业流水线中,例如:企业为了提高产品的竞争力,一般安排工人对产品的质量进行检验,具有费时费力的特点;因此,近来与企业合作,对传统生产线进行改造,设计一款AI识别检测箱,具体如下所示:

AI算法在嵌入式平台的部署实践
1.环境搭建
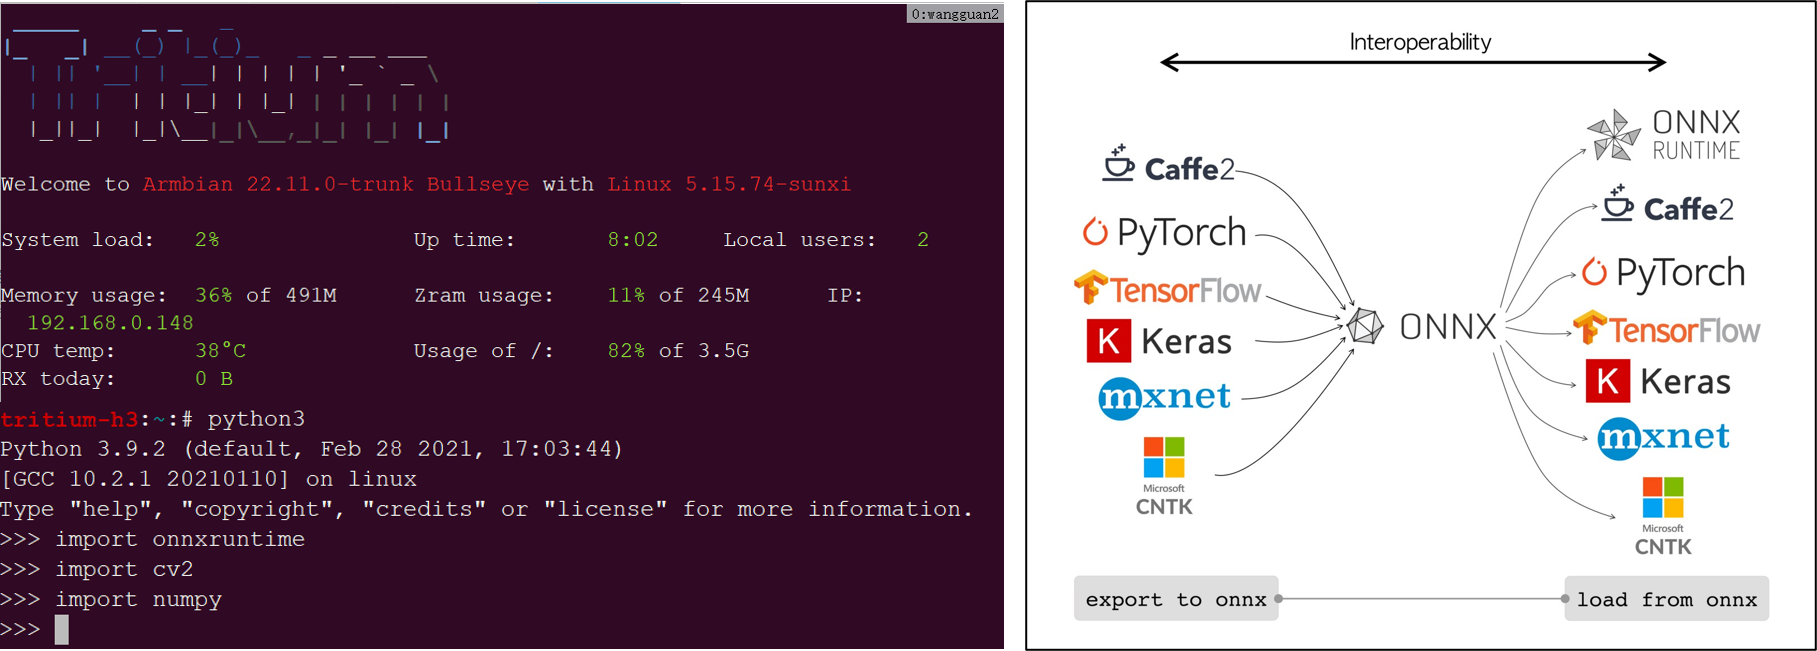
尽管网关预装了Ubuntu系统,安装有python环境,但是其内核架构一般选用Armv7l,与电脑端安装库文件有些许区别。本部分对环境搭建相关的内容进行归纳汇总:1. miniconda 搭建(可选);2. 安装opencv, numpy,torch以及onnxruntime等,具体位置为:具体的安装命令为:pip install <库名>
2.模型导出
ONNX作为一种标准AI模型格式,具有框架无关性,容易部署等优点。我们将 PyTorch 和 MATLAB 训练的模型导出为ONNX格式,后续采用 ONNX Runtime 进行推理。附1:对于YOLO V8算法导出 ONNX 模型的核心代码为:yolov8_model.export(format=‘onnx’);附2:ONNX Runtime比较精简,非常适合部署在工业机器人,网联汽车等嵌入式设备。

3.运行
在使用 ONNX Runtime 框架进行图片识别的过程中,我们需要对输入数据进行预处理,并且从输出数据中提炼出识别结果,进而应用于无人监守场景,具体用的代码如下所示:
import cv2
import numpy as np
import onnxruntime as ort

class YOLOv8:
    def __init__(self, onnx_model, input_image, confidence_thres, iou_thres):
        self.onnx_model = onnx_model
        self.input_image = input_image
        self.confidence_thres = confidence_thres
        self.iou_thres = iou_thres

        self.classes = ["1W"]
        self.color_palette = np.random.uniform(0, 255, size=(len(self.classes), 3))

    def preprocess(self):
        self.img = cv2.imread(self.input_image)
        self.img_height, self.img_width = self.img.shape[:2]
        img = cv2.cvtColor(self.img, cv2.COLOR_BGR2RGB)
        img = cv2.resize(img, (self.input_width, self.input_height))
        image_data = np.array(img) / 255.0
        image_data = np.transpose(image_data, (2, 0, 1))
        image_data = np.expand_dims(image_data, axis=0).astype(np.float32)
        return image_data

    def postprocess(self, input_image, output):
        outputs = np.transpose(np.squeeze(output[0]))
        rows = outputs.shape[0]
        boxes = []
        scores = []
        class_ids = []

        x_factor = self.img_width / self.input_width
        y_factor = self.img_height / self.input_height

        for i in range(rows):
            classes_scores = outputs[i][4:]
            max_score = np.amax(classes_scores)
            if max_score >= self.confidence_thres:
                class_id = np.argmax(classes_scores)
                x, y, w, h = outputs[i][0], outputs[i][1], outputs[i][2], outputs[i][3]

                left = int((x - w / 2) * x_factor)
                top = int((y - h / 2) * y_factor)
                width = int(w * x_factor)
                height = int(h * y_factor)

                class_ids.append(class_id)
                scores.append(max_score)
                boxes.append([left, top, width, height])

        indices = cv2.dnn.NMSBoxes(boxes, scores, self.confidence_thres, self.iou_thres)

        for i in indices:
            box = boxes[i]
            score = scores[i]
            class_id = class_ids[i]

        return input_image

    def main(self):
        session = ort.InferenceSession(self.onnx_model, providers=["CUDAExecutionProvider", "CPUExecutionProvider"])
        model_inputs = session.get_inputs()
        input_shape = model_inputs[0].shape
        self.input_width = input_shape[2]
        self.input_height = input_shape[3]

        img_data = self.preprocess()
        outputs = session.run(None, {model_inputs[0].name: img_data})
        return self.postprocess(self.img, outputs)